Wednesday, March 18, 2009

Which way home...

I've had my reading glasses on for much of the last two weeks. The books that have taken much of this time are dealing with the main ideas behind directing motion pictures.

The first is called Directing Actors. It deals directly, and in a beautifully nuanced way, on getting the most from actors. Having been an actor for many years I found this book to be excellent. It reminded me how much fun acting can be - the listening, the moment to moment exhilaration of being in a scene with another actor, and it reminded me of how some of the best directors I've worked with have gotten more out of me as an actor.


The next is called Film Directing Shot by Shot: Visualizing from Concept to Screen. It is more of a text book and doesn't deal a lot with the actor / director dynamic, but is aimed at what is actually in the frame. The whys of how you frame a subject, and more importantly, the pre-visualization of each shot and scene.


This book is a great primer about the craft of directing. Craft is something that has become more important to me as I've gotten older and I'm always excited to find gems like this.

And the last book is a wonderful picture book called Master Shots: 100 Advanced Camera Techniques to Get an Expensive Look on Your Low-Budget Movie.


Yeah, the title says it all. This book is a must have for anyone trying to get their indie piece looking as good as possible. Kenworthy (the author) takes shots from known films and dissects why they're so good and what effect they're having on the audience. Totally cool. All these books are in my reference library and I highly recommend them.

Wednesday, March 4, 2009

Dollies and Cranes...

A bit more on moving the camera...
 
Getting the camera on a track and crane is usually the domain of highend productions, but there are ways to do this without a huge budget - but it will take a bit of work.
 
I bought this e-book from dvcamerarigs.com
 

 Then built this rig.
 

It cost about $250 (including $40 bucks for the book) and works pretty good - not quite what you'd get from a high end rig, but with a bit of practice it's works well.

Dan Selakovich has thought up some great rigs and gives easy to follow instructions as well as a full shopping list so you don't forget anything at the hardware store. This book is well worth the $40 bucks if you want to build some cool camera rigs.


I did a bit of customization - I added a fluid head to the camera platform, then added another shelf below the camera to hold a monitor so I can see every thing with ease.
 
Here's the maiden voyage of my new rig...
 

Monday, February 23, 2009

Hold it...

With camera prices dropping quickly and the quality of cameras going up, one of the questions most indie filmmakers ask is:
Which camera should I buy?

But that question may not be as important as you think...
Because everything is in flux, it may not be wise to shell out a lot for a camera - my latest camera is the Cannon HV-30.

One of the big questions for me is:
How do I move the camera?
First off, if you're going to hand hold these fly-weight cameras, you've got to give them a bit of weight...


I got the plans for this "Ghetto Cam" from Stu Maschwitz' book "The DV Rebel's Guide." I can't say enough about this book - beginning to end it gives you the in's and out's of low budget filmmaking in the digital age. Well worth the price paid, and he has a great blog (Prolost.blogspot.com) and a cool forum for DV Rebels.

So, when I was making the Ghetto Cam, I decided I wanted a shoulder mount for my hand held shots and came up with this:


Kind of a Ghetto Cam 2...


A couple of braces to hold the 2x4s together, couple of short pieces of dowel, some screws, black spray paint, and presto, a shoulder mount for my little camera that adds more weight and control - all for about $3.75.

Another thing I knew I wanted was a decent tripod. I wanted it to be medium weight, stable, and have a fluid head.
The Davis and Sanford 7518B is what I ended up with (along with some wheels to set it on).


The whole set up was around $225 or so, and well worth it. Gives great "Movie" like pans, and with the wheels you've got a low budget doorway dolly.

So, the answer to which camera to buy might not be as relevant as the camera companies what you to believe... as developments continue, we will all be trading up with much more regularity.

For me, the question of how I move the camera is much more important - which ever camera I'm using.

Dom

Wednesday, February 11, 2009

PreViz2

In my quest to find the easiest and cheapest way to pre-visualize a film, I checked out MovieStorm, which Tari Akpodiete suggested.

Unfortunately the program is not very steady -at least on a Mac. It starts bugging out when I ask it to do anything other than the simplest functions, such as building a room on the virtual set.
When I added things to my room such as furniture and an actor, the program began to flash and get very unstable.
Also, when I quit, the program crashes—every time.

There also doesn't seem to be any way to build a set to scale or to set up different types of cameras (35mm, HDV, etc.), two things I really like about FrameForge.

But the program does have some very nice aspects:

1. It's free! This counts for several points in the plus column.

2. The camera is easily moved—either simple "cut" style moves, or complex moves as if the camera's on a track and jib-arm. Very cool.


3. A simple GUI. It's not that great, but after watching the tutorials on the web site, I could get some stuff happening.


4. You can buy different bundles to add to the program. I haven't done this yet, but they're not too expensive and I may try one or two out.

The not-so-good:
1. Bugginess.
2. Program skims across the surface and doesn't hit all the levels that FrameForge does.
3. Although there are video tutorials online, I can't find any written documentation on the program.

Overall, I like the program and am going to jump in a little deeper with it.
Dom

Wednesday, February 4, 2009

PreViz

One thing I've been giving some thought to is:
How do I do real pre-production for the things I shoot?

By "real" I don't mean making a list of stuff to pick up at Trader Joe's so I can feed everybody (although that's important) - I mean what are the shots going to look like? 

The most obvious way to do this is story boarding...


As you can see, my drawing skills aren't great. But my lack of drawing skill is only part of the problem.
The real questions I want answered are:

Where do I put the camera? Low to the ground, just off the ceiling, eye level?
What kind of camera movement do I want? Hand held, on a track, or on a tripod?
And the list will continue to grow as the needs of the project come to light.

Several years ago I noticed the big budget films were doing something called animatics. They would "pre-visualize" the whole scene in a 3D world and get a clear idea of any issues they'd be facing before getting anyone on set. Seemed like a pretty good idea.

Well, I recently found a low-budget substitute for working in Maya or one of the other high-end 3D programs. It's called Frame Forge Studio 2.

The program is good. There's a room builder, where you can build a virtual replica of your set. There are actors and props - all of which you can manipulate till your heart's content.


Another good thing about the program is you can adjust the camera specs - not only the camera height and placement, but focus and depth of field too!


At $400 bucks, it's not super cheap, but you can find it cheaper on the web. I paid around $250 for my copy.

Check it out. It's a pretty good tool for the Indie director / producer.

Monday, January 26, 2009

Journey with a Thousand Heroes

For many years I've been interested in how stories are structured—more specifically, the hero's journey. I became aware of this mythic story structure on TV when I saw a PBS series with Bill Moyers interviewing Joseph Campbell, called "Joseph Campbell and the Power of Myth." Wow —really great stuff. Campbell talks about how we've inherited a story structure that has been passed down to us from thousands of years - and from all cultures. 

A thumbnail of the structure goes like this: 

We first see the hero in their ordinary world, but something's not right. Either the hero needs growth in some aspect of their life, or something from the outside forces them to change, thereby sending them into the new world of Act 2...

In this new world, the hero faces challenges, meets new friends (and enemies), and strives towards getting back to the old world with the treasure and themselves intact. But things rarely go that easily, and when the hero is farthest away from their goal, a new tactic is needed. Which sends them into Act 3...

Act 3 is all or nothing, do or die. The hero needs everything they've learned from their Act 2 turmoils to succeed and walk away with the illusive prize. Sometimes they don't do it. Sometimes it means death—if not a physical death, then a death of some part of them, which leaves them better than when they began the journey. In the last step in the sequence, the hero returns to the world and brings their new knowledge to the rest of us. 

In the series, Campbell talks about the myths we all live with, how these myths help us at different stages of our lives, and how these myths are pretty much the same in every culture around the world.  


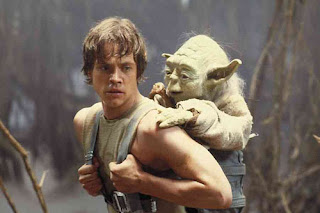
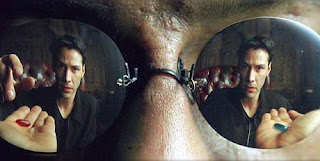
Star Wars and The Matrix are classic examples of the hero's journey at work - all films (and stories) have at least some mythic elements embedded in them, which is why they strike us so deeply. The best filmmakers have tapped into this mythic structure and create new worlds that ring with authenticity.  


In his seminal book "The Hero with a Thousand Faces," Campbell talks about stories from around the world and how they all stick to certain story principles. As a professor, he loved the details of each culture's myths; by comparing them, he shows how they address the emotional and spiritual needs of the communities they are from. That said, the book is not an easy read, but very worthwhile. 

Another great book on the subject is "The Writer's Journey" by Christopher Vogler. This book breaks down Campbell's ideas into easy, understandable language and gives a blueprint of "The Wizard of Oz" and how it works within this structure. 

Both these books are well worth the price. I've done a brief Flash overview on the high points of these books that can be found here

Nothing happening? You may need a Flash Player...
You can get one here.

Monday, January 19, 2009

Lost in Translation

Whether it's NTSC, Mac, or PC color space, how do you know your images will translate correctly and look the way you want them to?

Color Management... I know, sounds a little, well, dry. Yeah.
It is, but it's also pretty darn painless. With a few clicks and a couple of pull-down menus, you can know:
1. How After Effects sees and interprets your footage, and what that means to your output.
2. What you can do about it.
Doesn't that sound good?

First, we'll look at the Project Window. After highlighting the file, you can look at the top of the project window and see how AE sees your footage:


"Millions of Colors" in the top box and JPEG under "Type". That's all great, but this only tells me it's a still photo with pretty good color...
But, if you hit the bit depth setting at the bottom of the project window, the project settings window will be displayed:


Here you get a lot more info about what's going on, and what you can do to change it.


As you can see, the box is broken into different sections that deal with different things:
Display Style, Color Settings, and Audio Settings
The only one we're concerned with now is "Color Settings."

This is where the action is, as far as what your footage looks like.
The first thing I would recommend is:
Always use 16 or 32 bit color. 16 is good, 32 is very good, but 32 can slow your machine down to sloth time.
(The speed of your machine and the quality of output you need will dictate which you choose.)

Next, and just as important, are the "Working Space" settings. If this is set to "None," it will not interpret your footage and give the generic "Millions of Colors" description we saw earlier. For this project, I'm going to set the "Working Space" to SDTV NTSC (and a bit depth of 16).


By changing the "Working Space" settings to anything other than "None", AE will start seeing your footage, as opposed to looking at it:


As you can see, suddenly we have a "Profile" sitting under the "Millions of Colors" declaration. This is good. Now AE sees the photo and can read the color info embedded in it.

There are times when you might want to override the original color profile. One reason would be moving between platforms: Windows to Mac or vice-versa.
Images saved on a Windows machine will be saved as an sRGB color profile. These will look a bit washed out on a Mac. Images saved on a Mac will use the Apple RGB profile, and these will look dark on a Windows machine.

If you select the file in the Project Window and hit command-F, the Interpret Footage window will be displayed:


There you can override the original color profile if need be and get your bobber looking like it should.

With NTSC:


With sRGB:


With Apple RGB:


Or one of the other flavors that might suit your output needs....

Happy coloring!